What is BepInEx?
“Bepis Injector Extensible is a patcher/plug-in framework for Unity games that use Mono as their scripting backend.” https://docs.bepinex.dev/index.html
Why does it need an Installer?
I always thought this Framework wasn’t as easily usable for End-Users as it should be. To install BepInEx into your game, you need to select the right version for your game (32Bit or 64Bit) and if it is Mono or IL2CPP.
I really wanted this to be as easy as possible with nothing to go wrong. For that reason i searched for an Installer and ended up finding the one by aedenthorn: BepInExUnityInstaller.
Why i made my own Version
This Installer was only for Mono on Windows. I myself use Linux as a Daily driver, so i first made my own Version which can be used on Linux. BepInEx on Linux with Proton also has the problem, that it needs to have the proton-prefix configured. For that reason i also wanted the Installer to configure Proton automatically.
aedenthorn’s Installer also had to be placed inside the game’s files, so i wanted to add functionality to not always have to place the executable in a different place and run it.
CLI Version (Powerusers)
I first started by cloning aedenthorn’s BepInEx Unity Installer and added support for Linux.
Usage
- First Download the CLI Version either from GitHub or NexusMods.
- Decide if you want to use CLI-Arguments or place the executable in the gamefiles
- When placing in the gamefiles, simply run the executable in the folder where the Game’s .exe file is
- Follow along with what the Installer tells you in the Terminal
- After installing, manually install plugins (.dll files) by putting them inside BepInEx/plugins inside the gamefiles
Command Arguments (Terminal)
The available arguments to install BepInEx with the CLI-Version faster are:
-n <game_name>- Specify the name of the game to install BepInEx for (installer will locate the game in Steam libraries)-i <archive.zip>- Specify a zip archive containing plugins/mods to install into BepInEx/plugins folder-cor--console- Enable BepInEx console logging by setting Enabled=true in BepInEx.cfg-vor--verbose- Enable verbose output during installation for detailed information-hor--help- Display help message
If you are a Linux user, i expect you to know how to use the terminal and run an executable with arguments.
For Windows users, you need to start PowerShell and then use cd to navigate to where BepInExInstaller.exe is located at
Examples
Click to expand examples
# (Linux) Install BepInEx with console enabled and verbose output
./BepInExInstaller -n "Game Name" -c -v

# (Linux) Install BepInEx and plugins from archive
./BepInExInstaller -n "Game Name" -i plugins.zip

# (Windows) Install with plugins, console enabled, and verbose output
.\BepInExInstaller.exe -n "Game Name" -i mods.zip -c -v

# (Windows) Install with just console enabled
.\BepInExInstaller.exe -n "Game Name" --console

# Install with verbose output only
./BepInExInstaller -v -n "Game Name"
GUI Version (Recommended)
After the CLI-Version was released, i got various feedback from people trying to use my Installer who didn’t get how to use the Terminal and command arguments. For that reason and just to make it a bit nicer, i then started making a GUI-Version of the Installer.
To make the GUI-Version i used Godot 4.5 to design and make the UI.
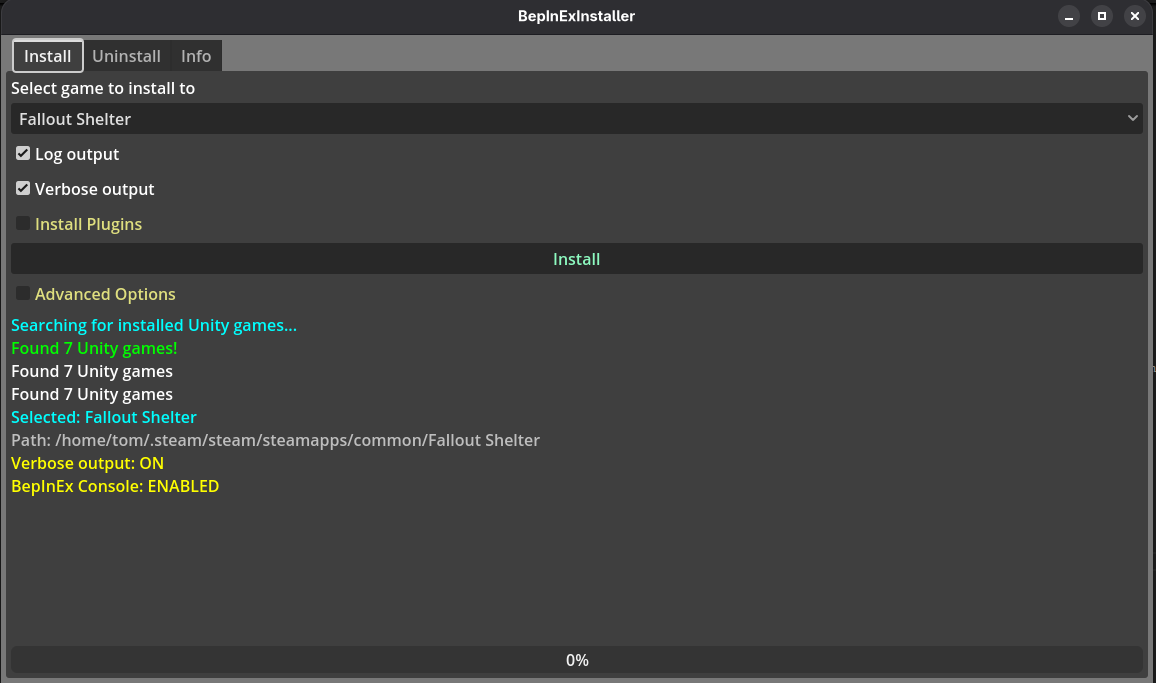 Picture 1: BepInEx Installer (GUI Edition) on Linux
Features
- Install BepInEx automatically to Steam Games
- Install to Manually set Location
- Automatically install plugins
- Configure Console Output
- Uninstall BepInEx automatically from Steam Games
Usage
- Download the File from GitHub or NexusMods (Linux or Windows)
- Run it
- Select the desired options
- Click “Install”